How to Broadcast on Facebook Live
Introduction Facebook Live has revolutionized the way individuals, brands, and businesses engage with their audiences in real time. Broadcasting on Facebook Live allows you to share live video content directly with your followers, creating an interactive and authentic experience. Whether you are hosting a product launch, conducting a Q&A session, or sharing a behind-the-scenes look, Facebook Live
Introduction
Facebook Live has revolutionized the way individuals, brands, and businesses engage with their audiences in real time. Broadcasting on Facebook Live allows you to share live video content directly with your followers, creating an interactive and authentic experience. Whether you are hosting a product launch, conducting a Q&A session, or sharing a behind-the-scenes look, Facebook Live is an invaluable tool for increasing engagement, boosting brand awareness, and building community.
This tutorial will provide a comprehensive, step-by-step guide on how to broadcast on Facebook Live effectively. You will learn practical techniques, best practices, and useful tools to ensure your live streaming sessions are professional, engaging, and optimized for reach.
Step-by-Step Guide
Step 1: Prepare Your Content and Equipment
Before going live, plan your content carefully. Define the purpose of your broadcastwhether its educational, entertaining, promotional, or a mix. Write a loose script or outline key points to maintain flow and avoid awkward pauses.
Ensure you have the necessary equipment ready:
- Camera: Use a smartphone, webcam, or professional camera depending on your quality needs.
- Microphone: Invest in a good external microphone for clear audio.
- Lighting: Natural light or ring lights can dramatically improve video quality.
- Internet Connection: A stable and fast internet connection is crucial to avoid disruptions.
Step 2: Access Facebook Live
Log into your Facebook account. You can broadcast live from several locations:
- Personal Profile: Share live video with your friends and followers.
- Facebook Page: Ideal for businesses or public figures to reach a wider audience.
- Facebook Group: Engage with a more targeted community.
Navigate to the status update area and click on the Live Video button to start setting up your broadcast.
Step 3: Set Up Your Live Video
Facebook provides two primary ways to start your live session:
- Using the Facebook App: Ideal for quick, informal broadcasts using your mobile device.
- Using Streaming Software: For professional-quality streams, connect third-party software like OBS Studio or StreamYard.
When you click to go live, you will be prompted to:
- Add a compelling description or title to attract viewers.
- Tag people or pages relevant to your broadcast.
- Select your audience (Public, Friends, Specific Groups).
- Choose to schedule your live video for a future date.
- Enable features like polls, Q&A, or crossposting.
Step 4: Start Broadcasting
Once setup is complete, press the Go Live button. As you broadcast, keep an eye on viewer comments and reactions. Engage actively by answering questions, acknowledging viewers, and maintaining energy.
Maintain a steady pace, speak clearly, and stay on topic. Use visual aids or screen sharing if applicable, especially when using streaming software.
Step 5: End and Save Your Broadcast
When finished, click End Live Video. Facebook will automatically save your broadcast to your timeline or page, allowing followers to watch it later. You can also download the video for repurposing.
Best Practices
Engage Your Audience
Live interaction is the key benefit of Facebook Live. Always greet viewers by name, respond to comments in real time, and encourage participation through questions or polls.
Optimize Timing
Broadcast when your audience is most active. Use Facebook Insights to determine peak engagement times and schedule your live streams accordingly.
Promote Your Broadcast in Advance
Create anticipation by announcing your live session ahead of time across your social channels and email lists. Use countdown posts or teaser videos to boost attendance.
Keep It Professional
Test your equipment and connection before going live. Choose a quiet, well-lit environment to enhance video and audio quality. Dress appropriately for your brand and audience.
Use Clear Titles and Descriptions
Make your live video easy to find and appealing by using descriptive, keyword-rich titles and summaries. This also improves discoverability in Facebook search and external search engines.
Analyze Performance
After your broadcast, review the analytics Facebook providesviewer count, engagement rate, and watch time. Use these insights to improve future broadcasts.
Tools and Resources
Streaming Software
OBS Studio: Free and open-source software for professional live streaming with advanced controls.
StreamYard: Browser-based streaming tool with easy multi-platform broadcasting and guest invitations.
Ecamm Live: Mac-exclusive tool with powerful live streaming features.
Hardware Recommendations
Microphones: Rode VideoMic, Blue Yeti USB Mic
Cameras: Logitech C920, Canon EOS M50 (for DSLR streaming)
Lighting: Neewer Ring Light, softbox lighting kits
Facebook Creator Studio
A free platform provided by Facebook that helps you schedule, manage, and analyze your live videos and other content efficiently.
Real Examples
Example 1: Product Launch Event
A tech company used Facebook Live to unveil a new gadget. They scheduled the event, teased the launch with countdown posts, and engaged viewers with live Q&A. The broadcast attracted thousands of live viewers and generated significant buzz on social media.
Example 2: Educational Webinar
An online fitness coach regularly hosts Facebook Live sessions demonstrating workouts and answering live questions. This consistent engagement helped grow their client base and increased sales of their digital courses.
Example 3: Behind-the-Scenes Tour
A restaurant owner streamed a live kitchen tour during peak hours. Viewers loved the authentic glimpse into food preparation, leading to increased reservations and positive reviews.
FAQs
Can I broadcast on Facebook Live from a desktop?
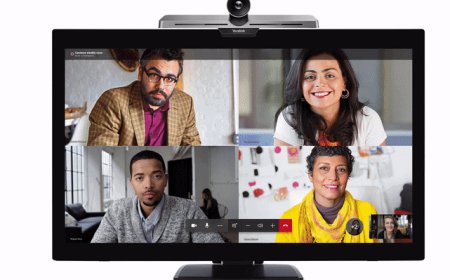
Yes, you can use Facebooks built-in live video option or third-party streaming software on a desktop to broadcast Facebook Live.
How long can a Facebook Live video be?
Facebook Live videos can last up to 8 hours, but its generally best to keep streams between 20 to 60 minutes for optimal engagement.
Can I schedule a Facebook Live broadcast in advance?
Yes, Facebook allows you to schedule live broadcasts and notify your followers ahead of time.
Is it possible to go live on Facebook with multiple guests?
Yes, using third-party streaming tools like StreamYard or Facebooks Live Producer, you can invite multiple guests to join your live stream.
How do I improve the quality of my Facebook Live video?
Use good lighting, a quality microphone, a stable internet connection, and test your setup before going live. Also, broadcast from a quiet environment.
Conclusion
Broadcasting on Facebook Live is a powerful way to connect directly with your audience, build trust, and grow your presence online. By following the step-by-step guide, adopting best practices, and utilizing the right tools, you can create engaging, high-quality live videos that resonate with viewers.
Remember to plan your content, interact authentically, and continuously analyze your performance to refine your strategy. With consistent effort, Facebook Live can become an essential pillar of your digital marketing and communication efforts.



&srotate=0)
