Your Design, Your Stitch: Creative Ways to Convert Image to Embroidery File
Transform any image into embroidery magic! Discover creative techniques to convert pictures to embroidery files with professional results using these innovative methods.
Introduction
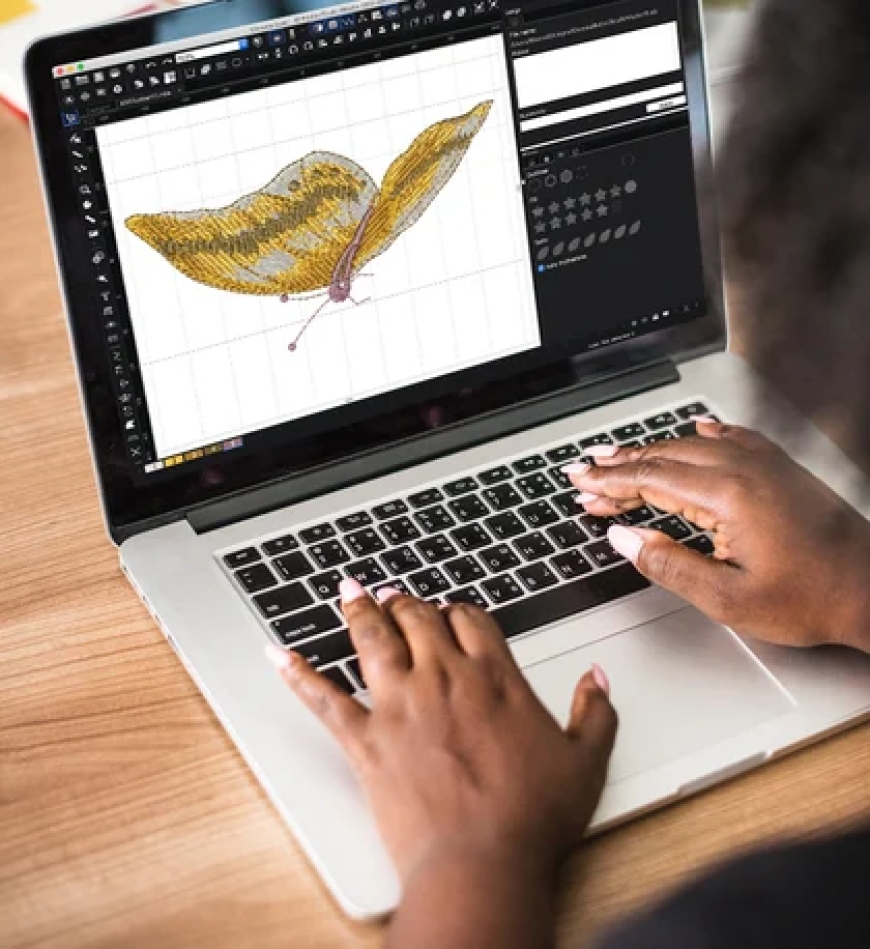
That perfect photo of your dog, your child's artwork, or your company logo - they all deserve to be more than just pixels on a screen. Convert image to embroidery file opens up a world of creative possibilities, letting you stitch personal memories onto fabric or turn digital designs into wearable art.
But here's the exciting part: today's tools let you approach this conversion process with real creativity. Beyond basic digitizing, we'll explore artistic techniques that make your embroidered pieces truly unique. Whether you're using a home machine or professional equipment, these methods will help you achieve results that look like they came from a high-end boutique.
Why Standard Conversions Often Disappoint
Before we dive into creative solutions, let's understand why basic image-to-embroidery conversions frequently fall short:
-
Detail overload- Tiny elements vanish when stitched
-
Color confusion- Digital hues don't match thread colors
-
Flat results- Lack of dimension makes designs look cheap
-
Fabric fights- Stiff stitching on flowy materials
The good news? Each of these challenges has creative solutions.
Method 1: The Artistic Reduction Approach
Instead of fighting to preserve every detail, embrace simplification:
Step-by-Step Creative Process:
-
Posterize your image(reduce to 3-5 colors)
-
Trace key outlineswith bold strokes
-
Assign stitch types strategically:
-
Satin stitches for focal points
-
Fill stitches for large areas
-
Running stitches for subtle details
-
Best for:Portraits, pet photos, and artwork
Pro Tip:Use watercolor effects in your editing software first for softer transitions
Method 2: Mixed Media Magic
Combine embroidery with other techniques for stunning effects:
Creative Combinations:
-
Embroidery + Fabric Paint: Stitch outlines, paint fills
-
Embroidery + Appliqu: Fabric pieces for large color blocks
-
Embroidery + Beading: Add sparkle to special areas
Tools to Try:
-
Sulky Printable Sticky Fabrics for precise painting guides
-
Heat-n-Bond Ultra for easy appliqu
-
Mill Hill beads for delicate embellishment
Method 3: Stitch Style Experimentation
Break free from standard stitch types with these creative alternatives:
Unexpected Stitch Applications:
-
Chain stitchfor organic, hand-drawn looks
-
Seed stitchfills for texture
-
French knotsto create pointillism effects
-
Free-motionfor abstract backgrounds
Software Helpers:
-
Hatch Embroidery's artistic stitch library
-
Embrilliance's stitch effect tools
-
Bernina's free-motion digitizing module
Method 4: Fabric-Centric Conversions
Let your material guide the design process:
Creative Fabric Adaptations:
-
For denim: Use heavier threads and wider satin stitches
-
For sheer fabrics: Convert to delicate shadow work
-
For towels: Design with loftier fills for texture
-
For knits: Create stretch-friendly patterns
Innovative Tool:
Fabric-sensing probes that automatically adjust digitizing settings
Method 5: The Deconstructed Approach
Create modern, artistic effects by breaking designs apart:
How to Deconstruct:
-
Separate your image into color layers
-
Stitch each layer on different fabric pieces
-
Reassemble with intentional gaps/overlaps
-
Add hand-stitched connecting elements
Perfect for:Modern abstract pieces and statement wall art
Software Showdown: Creative Conversion Tools
Best for Artistic Control:
-
Hatch Embroidery- Extensive stitch editing tools
-
SewArt- Affordable with good manual controls
-
Ink/Stitch- Free and surprisingly powerful
Best for Automated Creativity:
-
Embrilliance Express- Great artistic presets
-
Brother's Artistic Suite- Built-in creative filters
-
Janome's Digitizer MBX- Unique texture options
Creative Troubleshooting Guide
When artistic conversions go wrong:
Problem: Design looks too stiff
Creative Fixes:
-
Replace some fills with open patterns
-
Add intentional "sketchy" running stitch details
-
Mix in some hand-stitching after machine work
Problem: Colors look flat
Creative Solutions:
-
Use variegated threads
-
Layer translucent threads
-
Add subtle shading stitches
Problem: Important details lost
Artistic Approaches:
-
Outline key elements with contrasting thread
-
Add dimensional elements like cords or ribbons
-
Emphasize with strategic metallic threads
Beyond Clothing: Creative Applications
Take your converted designs to unexpected places:
Unique Project Ideas:
-
Stitched wall artwith photo conversions
-
Embroidered jewelryusing tiny designs
-
Patches with attitudefor bags and jackets
-
Quilt block centersfeaturing family photos
-
Hybrid greeting cardswith stitched elements
The Future of Creative Conversions
Emerging technologies to watch:
-
AI style transfer- "Make this look like a Van Gogh painting"
-
3D stitch modeling- Preview texture and dimension
-
Augmented reality previews- See designs on items before stitching
-
Eco-mode digitizing- Reduce thread waste creatively
Getting Started with Creative Conversions
Your action plan for artistic digitizing:
-
Start simple- Pick one creative method to try first
-
Gather inspiration- Create a digital mood board
-
Experiment freely- Designate "play" fabric for tests
-
Document results- Keep a stitch sample journal
-
Share your work- Join creative embroidery communities
Conclusion
Converting images to embroidery files doesn't have to be a technical chore - it can be the most creative part of your embroidery process. By embracing artistic approaches rather than fighting for perfect replication, you'll develop a signature style that makes your work instantly recognizable.
Remember that every stunning embroidered piece you've admired began as someone experimenting with converting images in new ways. Your perfect photo, your child's drawing, your original artwork - they all contain the seeds of incredible stitched creations. Now that you're equipped with these creative conversion techniques, that blank fabric isn't waiting for a design - it's waiting for your design.
Happy stitching, and may your needle always find the creative path!


&srotate=0)
